How to Generate Product Mockups with Claude
Use Claude with CreativeClaw to generate photorealistic product mockups, then seamlessly plant your app's screenshot into them. Multiple versions in parallel, fully automated.
What you'll make
Two photorealistic device scenes with the same app screenshot composited into the phone at the correct perspective, light, and reflection.
Yes—Claude can turn a real app screenshot into a photorealistic product mockup when CreativeClaw is connected. The reliable workflow is to generate several clean device scenes first, choose the best composition, then use the original screenshot as an edit reference. That keeps the interface more legible than asking an image model to invent the UI from text.
This walkthrough shows the complete two-pass process with Nano Banana 2: scene generation first, perspective-aware compositing second.
Make the mockup in Claude
Turn your screenshot into a campaign-ready scene
Connect CreativeClaw, upload one interface, and let Claude generate, compare, and refine the mockup without leaving the conversation.
Create a product mockupWatch it in action
The workflow
Step 1: Upload your app screenshot
We uploaded this Airbnb maps screen (thanks to Mobbin for the reference and Airbnb for the design) as our demo app screenshot.
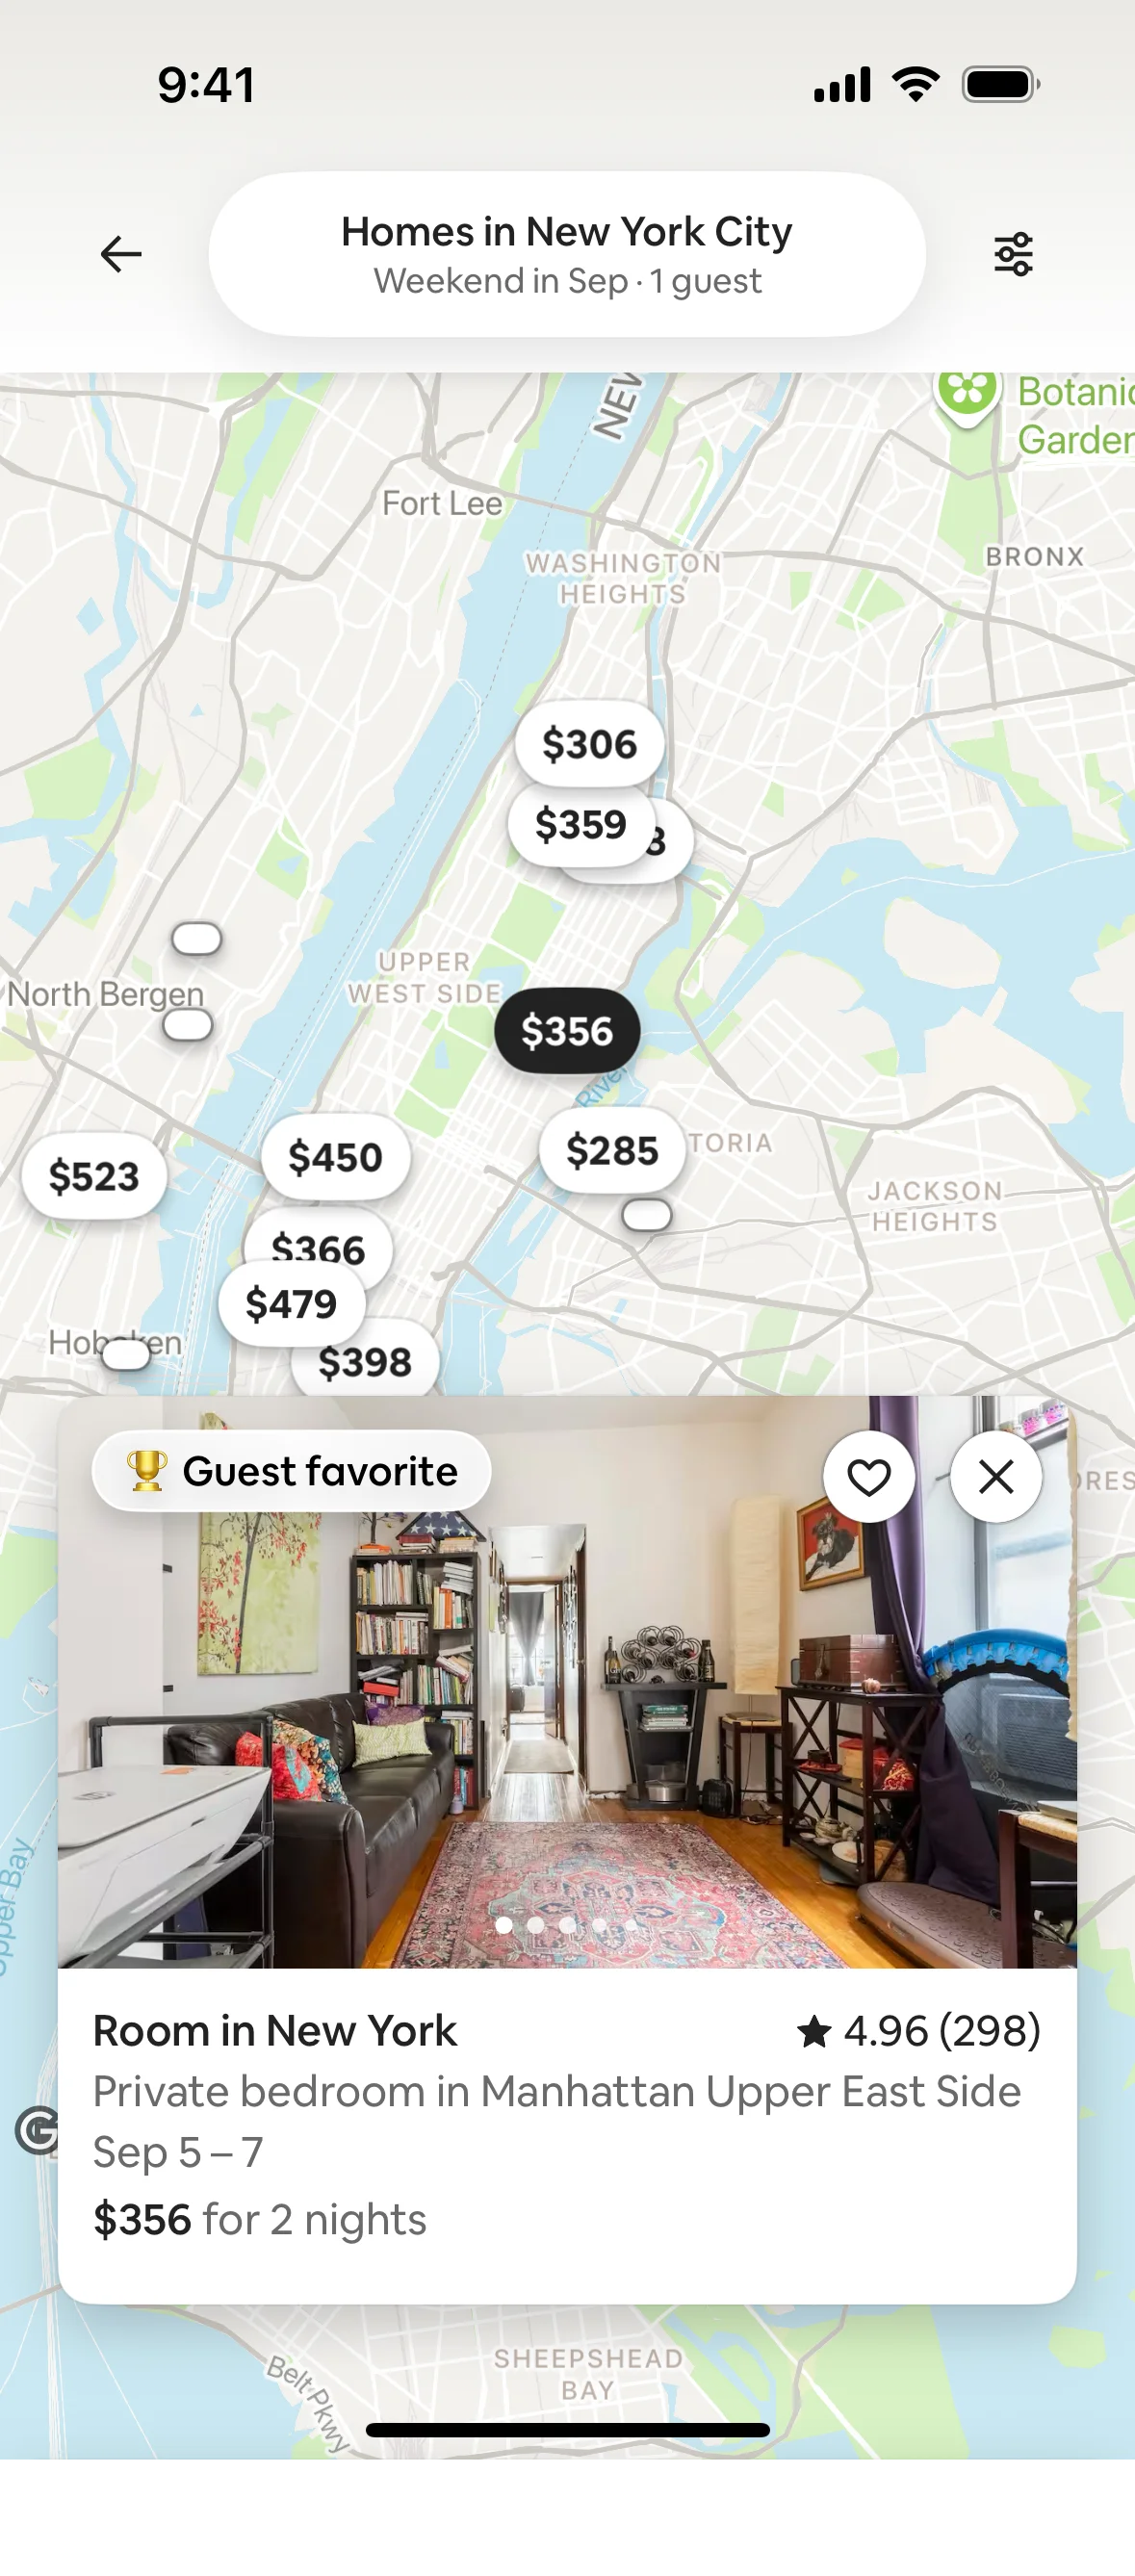
Once uploaded, the screenshot is saved as a named asset in CreativeClaw. That means you can reference it by name in any future conversation — no need to re-upload.
Use a descriptive asset name such as acme-ios-dashboard-v3. Versioned names prevent Claude from selecting an older screen after the interface changes.
Step 2: Generate mockup scenes in parallel
We asked Claude to generate multiple versions of a person holding a phone in an interesting setting — in this case, an astronaut in space. Claude used Nano Banana 2 to generate two versions in parallel, each with a different composition and pose.
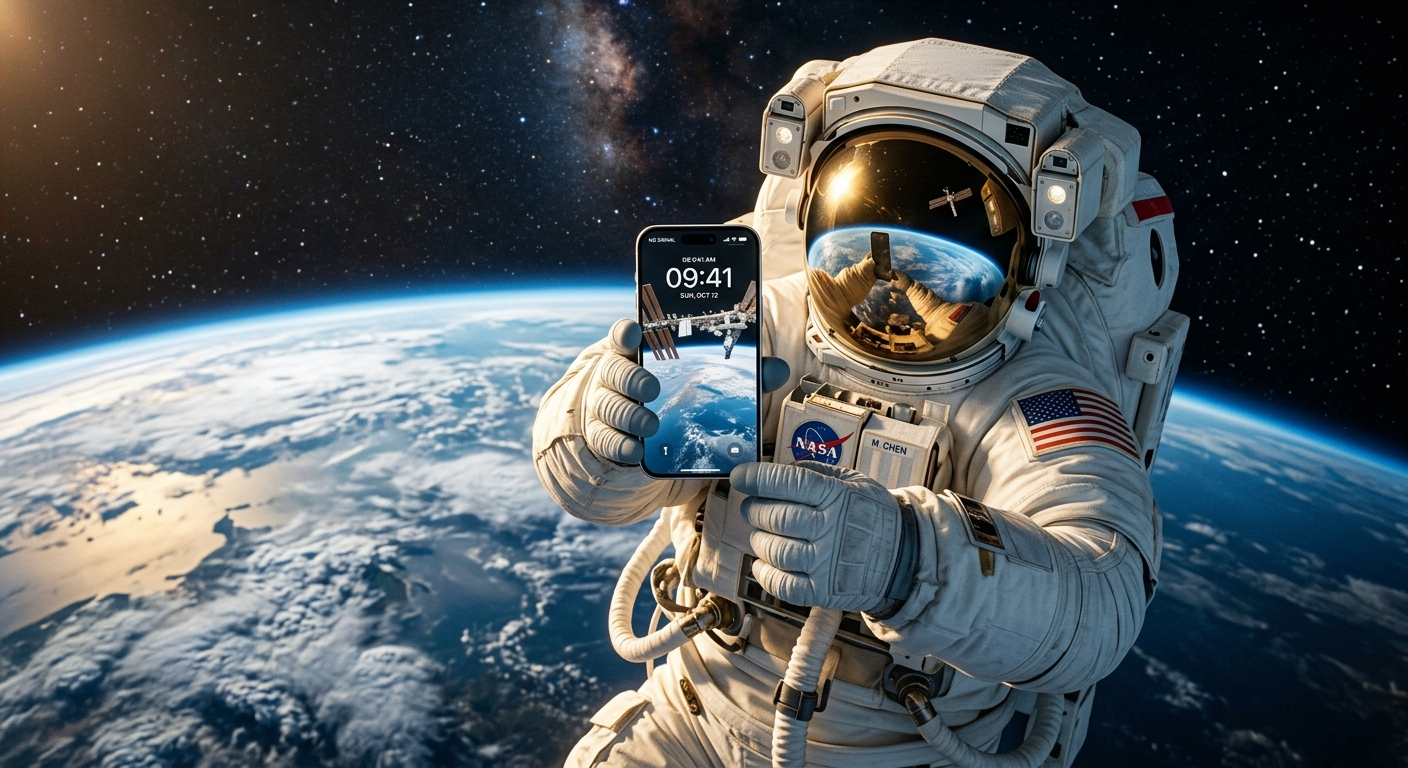
Version 1 — before
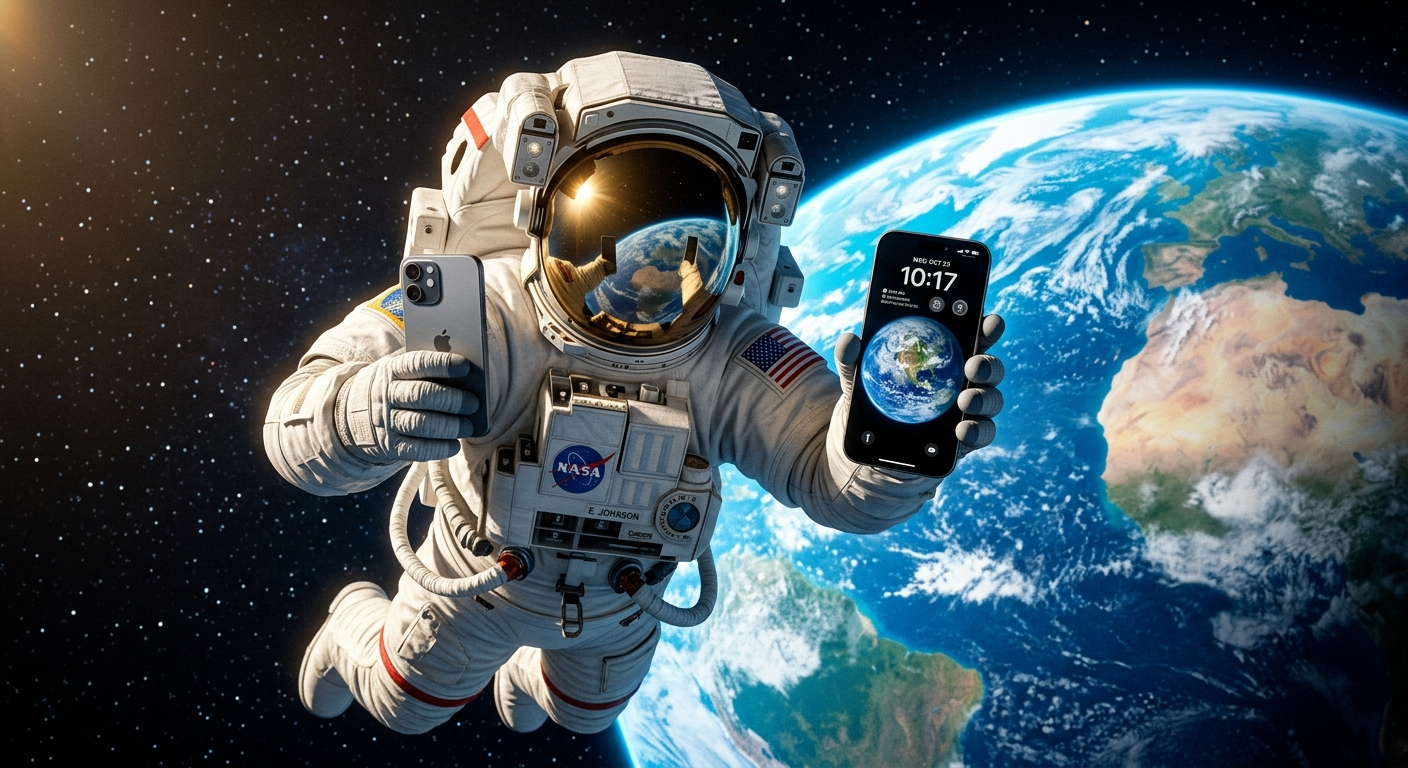
Version 2 — before
Step 3: Plant your app into the best ones
Claude then used Nano Banana 2’s editing mode to seamlessly composite the app screenshot into the phone screens. The model understands perspective, lighting, and reflections — the result looks like a real photo.
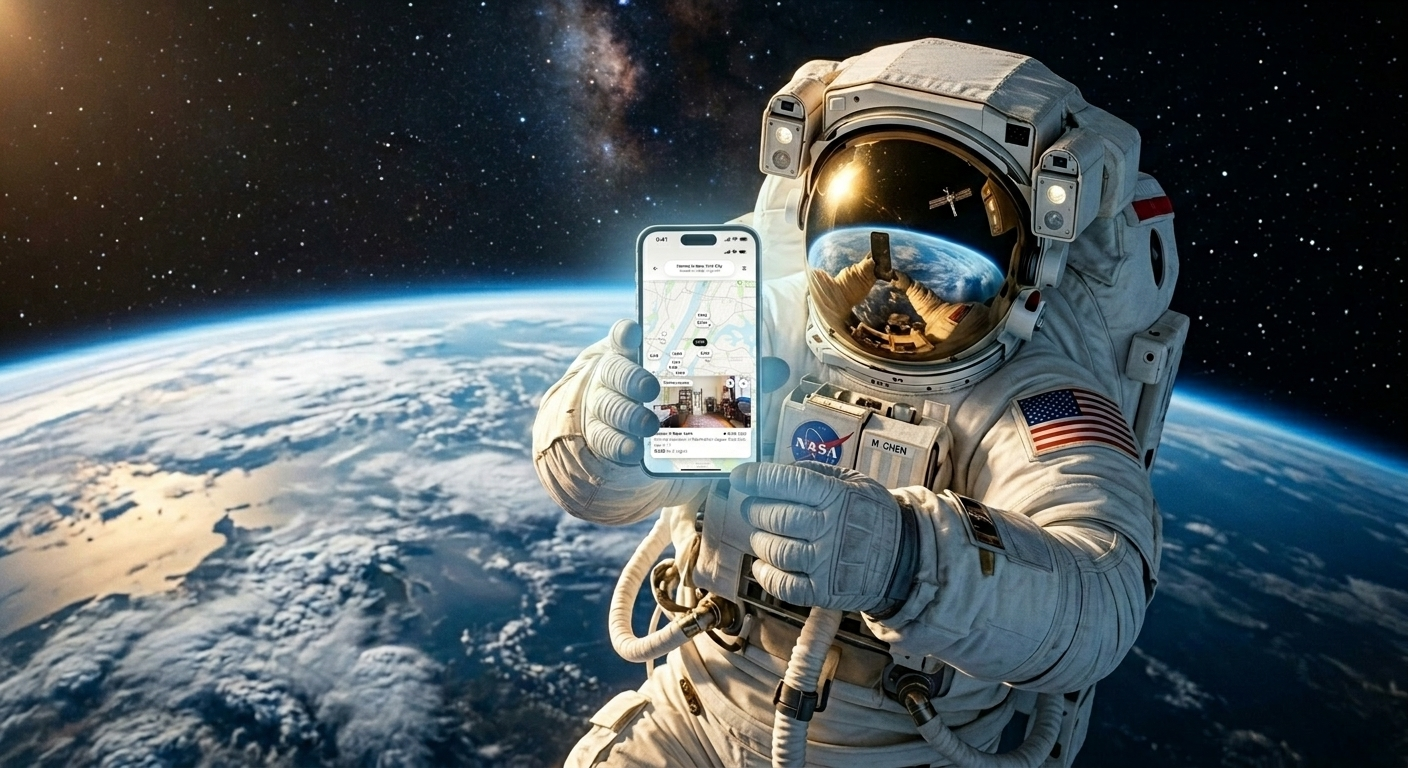
Version 1 — after
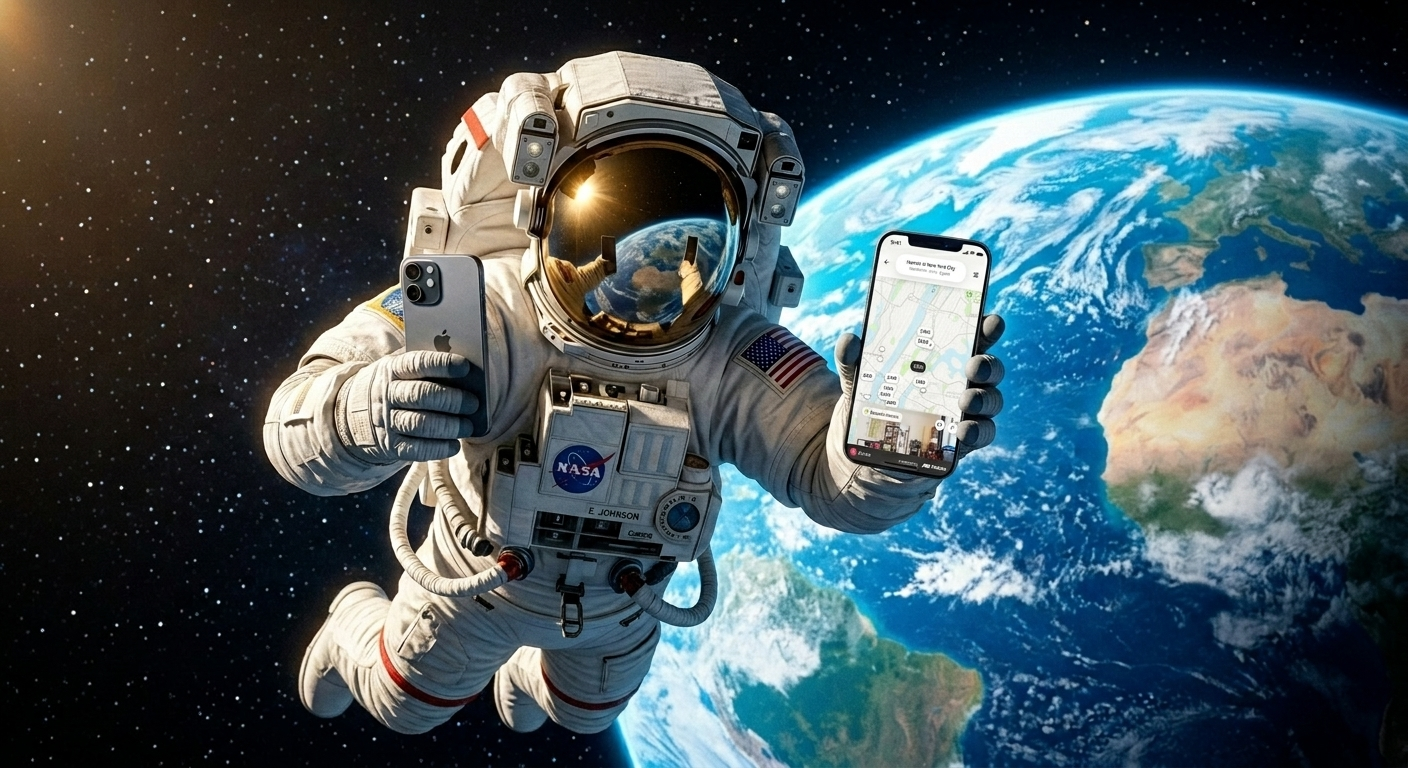
Version 2 — after
Before and after
Before
After
Fully automated mode
This entire workflow can run on autopilot. Claude generates multiple mockup scenes, evaluates the results, picks the best one, edits the app into the phone, and iterates if needed — all without you lifting a finger. You just describe what kind of scene you want and which app screenshot to use.
Since your uploaded assets are saved by name in CreativeClaw, you can simply say “use my Airbnb screenshot” in any future conversation and Claude will find it instantly.
Copy this product-mockup prompt
Use CreativeClaw to make a photorealistic product mockup from my uploaded
app screenshot, [asset name].

First generate three phone scenes with:
- a large, unobstructed screen facing the camera
- realistic hands, bezels, reflections, and studio lighting
- no invented UI, logos, captions, or text on the device

Show me the three scenes before editing. After I choose one, place the exact
uploaded screenshot into the display. Match its perspective, crop, lighting,
and reflections without changing any interface text or layout. Then inspect
the result for screen legibility, bezel alignment, distorted fingers, and glare.
The approval step matters. It avoids spending edit credits on a scene whose phone angle or hand placement cannot support a readable interface.
Time and credit budget
Plan for about two minutes of active review plus generation time. Nano Banana 2 currently costs 16 credits per standard image, so the final cost depends on the number of scene options and edit attempts. Start with two or three scenes, approve one, then make one controlled composite instead of generating a large blind batch.
Check the live CreativeClaw pricing table before a larger run. For a broader model test, use the same-brief image comparison walkthrough.
Model used
| Model | Role | Why this model |
|---|---|---|
| Nano Banana 2 | Scene generation + image editing | Best for photorealistic scenes with fine detail. Editing mode handles perspective-aware compositing natively |
Quality-control checklist
- The screenshot text is readable and has not been rewritten.
- The screen sits inside the bezel at the correct perspective.
- Fingers do not cover important interface controls.
- Reflections follow the scene lighting without obscuring the UI.
- The phone, hands, and background remain physically coherent.
- The crop leaves enough space for the intended headline or CTA.
If the screen fails, keep the original scene and run a narrower edit. If the device or hands fail, regenerate the scene before compositing.
Frequently asked questions
Can Claude create a product mockup from my app screenshot?
Yes. With CreativeClaw connected, Claude can save your screenshot, generate device scenes, and composite the real interface into an approved scene with perspective-aware image editing.
Which AI model is best for product mockups in Claude?
Nano Banana 2 is CreativeClaw’s recommended default for this workflow because one model can generate the scene and edit the screenshot into the device. Compare alternatives when the brief needs a different photographic style.
How much does an AI product mockup cost?
Nano Banana 2 currently costs 16 CreativeClaw credits per standard image. The total depends on how many scene options and edits you request; the live pricing page has the current catalog.
How do I keep the app screen readable in an AI mockup?
Use the real screenshot as an edit reference, choose a scene with a large unobstructed screen, and review perspective, bezel alignment, reflections, and text legibility before approving the result. New to the setup? Connect CreativeClaw to Claude first.
Built with
Want to build something like this?
Connect CreativeClaw to Claude in under a minute.
Get Started